

Hey there! I'm a supplier of rubber band colors, and I'm super excited to share with you how you can create your own rubber band colors right at home. It's a fun and creative project that allows you to customize your rubber bands to match your style or specific needs.
Getting Started: What You'll Need
First things first, let's talk about the supplies you'll need. You don't have to break the bank to get started. Here's a simple list:
- Plain Rubber Bands: You can find these at your local dollar store or office supply store. Make sure they're the right size for your project.
- Fabric Dye: This is the key to adding color to your rubber bands. You can choose from a wide range of colors at your local craft store. I recommend using fabric dye because it adheres well to the rubber and gives a long - lasting color.
- Containers: You'll need small containers to hold the dye and soak the rubber bands. Old plastic cups or small glass jars work great.
- Gloves: To protect your hands from the dye, especially if you're using bright or dark colors.
- Stirring Utensils: Something like a small wooden stick or a plastic spoon to stir the dye.
Preparing the Dye
Once you've gathered all your supplies, it's time to prepare the dye. Follow the instructions on the fabric dye package carefully. Usually, you'll need to mix the dye powder with hot water in the container. Stir it well until the powder is completely dissolved.
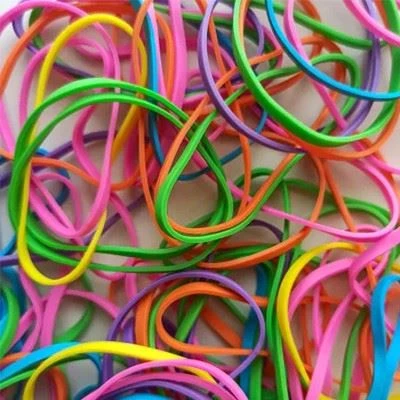

If you want to create different shades of the same color, you can adjust the amount of dye you use. For a lighter shade, add more water; for a darker shade, use less water. This gives you a lot of flexibility in creating unique colors.
Dyeing the Rubber Bands
Now comes the fun part - dyeing the rubber bands! Put on your gloves to protect your hands. Take a few rubber bands at a time and dip them into the dye. Make sure they're fully submerged. You can use the stirring utensil to move them around in the dye to ensure even coverage.
The longer you leave the rubber bands in the dye, the darker the color will be. For a light, pastel color, you might only need to leave them in for a few minutes. If you want a bold, bright color, leave them in for 10 - 15 minutes or even longer.
Once you're happy with the color, carefully remove the rubber bands from the dye using the stirring utensil. Let them drip over the container to get rid of the excess dye. Then, lay them out on a piece of paper towel to dry.
Creating Different Color Combinations
One of the best things about making your own rubber band colors is that you can create all sorts of unique color combinations. You can dip one end of a rubber band in one color and the other end in a different color to create a two - toned effect.
You can also try layering colors. First, dye the rubber bands one color and let them dry. Then, dip them in a second color for a more complex and interesting look.
Neon and Bright Colors
If you're into really eye - catching colors, you might want to check out Neon Colored Rubber Bands. Neon colors are super trendy right now, and you can create them at home using neon - colored fabric dyes.
Bright colors are also a great option. They can add a pop of color to any project. You can find a wide variety of bright colors in fabric dye, and you can create your own Bright Colored Rubber Bands easily at home.
Moving Rubber Bands
Another cool idea is to create Moving Rubber Bands. You can do this by using different colors and creating patterns on the rubber bands. For example, you can make stripes by masking off parts of the rubber band with tape before dyeing.
Tips and Tricks
- Test First: Before dyeing a large batch of rubber bands, it's a good idea to test the dye on a few rubber bands first. This way, you can see how the color turns out and make any adjustments if needed.
- Rinse Thoroughly: After the rubber bands are dry, give them a quick rinse under cold water to remove any excess dye that might bleed.
- Store Properly: Once your rubber bands are dry and ready to use, store them in a cool, dry place. This will help keep the colors vibrant for longer.
Using Your Custom Rubber Bands
Now that you've created your own rubber band colors, the possibilities are endless. You can use them for all sorts of things, like:
- Craft Projects: Make jewelry, keychains, or decorative items.
- Office Use: Keep your papers organized or use them to mark important pages in a notebook.
- Gifts: Create unique gifts for your friends and family.
Why Choose to Make Your Own
Making your own rubber band colors has several advantages. First of all, it's a lot of fun. It's a great way to express your creativity and have a hands - on project.
Secondly, it's cost - effective. Buying pre - colored rubber bands can be expensive, especially if you need a large quantity. By making your own, you can save money.
Finally, you have complete control over the colors and designs. You can create exactly what you want, whether it's a specific color for a project or a unique pattern.
Contact Us for More
If you're interested in purchasing rubber band colors in bulk or have any questions about the colors we offer, we'd love to hear from you. We're here to help you find the perfect colors for your needs. Whether you're a small business looking for custom - colored rubber bands for your products or an individual with a big craft project in mind, we've got you covered.
References
- "Fabric Dyeing Basics" - Craft Magazine
- "DIY Rubber Band Projects" - Online Craft Blog