

Making a rubber band spider is a fun and creative activity that can be enjoyed by people of all ages. As a leading supplier of high - quality rubber bands, I'm excited to share with you a detailed guide on how to make your very own rubber band spider. Not only is it a great way to pass the time, but it can also be a wonderful craft project for kids' parties or educational purposes.
Materials Needed
To create a rubber band spider, you'll need a few essential materials. As a rubber band supplier, I can offer you a wide range of options to suit your needs. First and foremost, you'll need rubber bands. I recommend using a combination of different types of rubber bands for the best results. You can check out our Mini Rubber Rings for the body of the spider, as they are small and can be easily manipulated. For the legs, High Strength Rubber Bands are a great choice. They are strong enough to hold their shape and give your spider a realistic look. Additionally, if you want to add some color and fun to your spider, you can use Big Colored Rubber Bands.
Other materials you'll need include a small object to serve as the center of the spider's body, such as a small bead or a button. You'll also need a pair of scissors and a bit of patience.
Step - by - Step Guide
Step 1: Prepare the Body
Take a few Mini Rubber Rings and stack them on top of each other. You can use 3 - 5 rings depending on how big you want the spider's body to be. Slip the small bead or button through the center of the stacked rubber rings. This will serve as the core of the spider's body and help hold the rubber bands in place.
Step 2: Attach the Legs
Now, it's time to attach the legs. Take the High Strength Rubber Bands and fold them in half. Slip one end of the folded rubber band through the stack of rubber rings that form the body. Pull the other end of the rubber band through the loop you've just created and tighten it. This will attach the leg to the body.
Repeat this process for each leg. A spider has 8 legs, so you'll need to attach 8 High Strength Rubber Bands in total. Make sure to space the legs evenly around the body to give your spider a balanced look.
Step 3: Shape the Legs
Once all the legs are attached, it's time to shape them. Bend the legs at different angles to give your spider a more realistic and dynamic pose. You can curve the legs slightly to make it look like the spider is crawling or reaching out. Use your fingers to carefully manipulate the rubber bands into the desired shape.
Step 4: Add Color (Optional)
If you're using Big Colored Rubber Bands, you can add them to the legs or the body for a pop of color. You can wrap the colored rubber bands around the legs or create patterns on the body. This step is completely optional, but it can make your spider more unique and eye - catching.
Tips and Tricks
- When attaching the legs, make sure the rubber bands are tightened securely. Loose legs can make the spider look messy and may not hold their shape well.
- If you're having trouble getting the rubber bands through the body, you can use a small needle or a toothpick to help guide them.
- Experiment with different types and sizes of rubber bands to create spiders of different shapes and sizes. You can make tiny spiders using only small rubber bands or large, imposing spiders with bigger bands.
Uses of Rubber Band Spiders
Rubber band spiders are not only a fun craft project but also have several practical uses. They can be used as party decorations. You can hang them from the ceiling or place them on tables to create a spooky or fun atmosphere for a Halloween party or a kids' birthday party.
They can also be used as educational tools. Teachers can use rubber band spiders to teach kids about spiders' anatomy, such as the number of legs and the structure of the body. It's a hands - on way to make learning more engaging and memorable.
Why Choose Our Rubber Bands
As a rubber band supplier, we take pride in offering high - quality rubber bands that are perfect for making rubber band spiders. Our rubber bands are made from premium materials, which means they are strong, durable, and have excellent elasticity. They are also available in a wide range of colors, sizes, and strengths, allowing you to create the perfect spider for your needs.
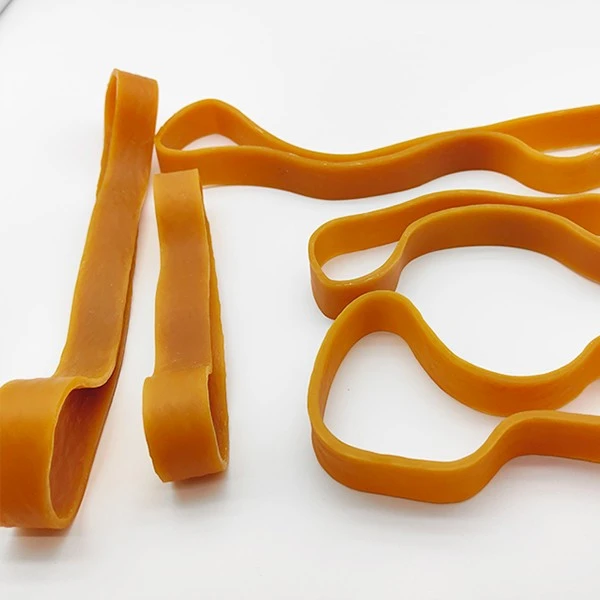

Whether you're a professional crafter, a teacher, or just someone looking for a fun activity, our rubber bands are the ideal choice. We ensure that our products meet the highest standards of quality, so you can be confident in the results of your projects.
Contact Us for Your Rubber Band Needs
If you're interested in purchasing rubber bands for your rubber band spider projects or other applications, we'd love to hear from you. We offer competitive prices, fast shipping, and excellent customer service. Contact us today to discuss your requirements and start creating amazing rubber band spiders and other crafts. We're here to help you bring your creative ideas to life with our top - notch rubber bands.
References
- "Crafting with Rubber Bands" - A guidebook on various rubber band crafts.
- Online resources on spider anatomy for educational reference.